Warranty Registration
Step 2 : Login the App
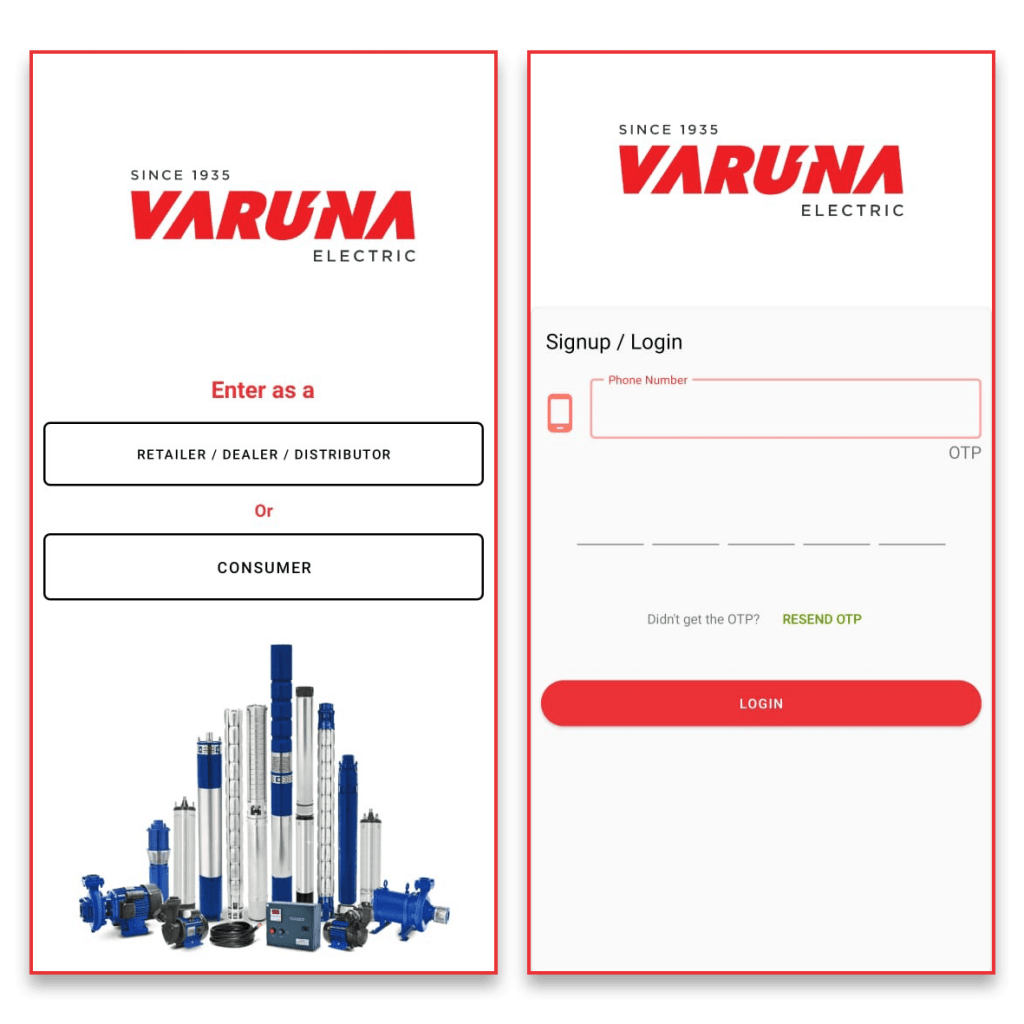
- Open the App, Varuna Connect.
- On your homescreen, you will find 2 options:
- Enter as a Retailer/Dealer/Distributor
- Enter as a Consumer
- Click on ‘Enter as a Consumer’
This will take you to the Login Page.
- Here you need to enter a 10 digit mobile number.
- An OPT (One Time Password) will be generated.
- Enter the 5 Digit OTP.
- Click on ‘Login’


Step 3 : Individual Customer Account
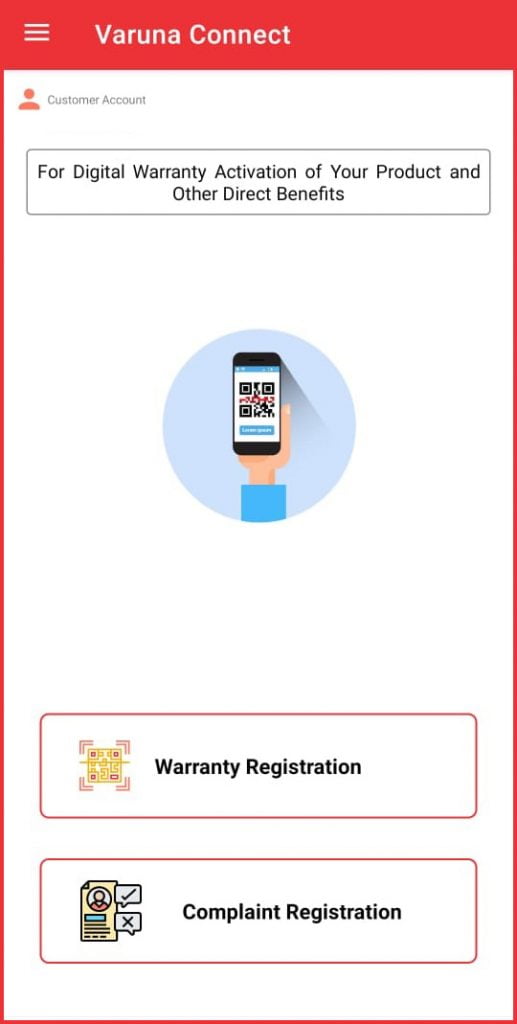
- Once you Log into your account, your individual account page will open.
- You have two options on the main screen
- Warranty Registration
- Complaint Registration
- Click on ‘Warranty Registration’
Step 4 : Scan QR Code
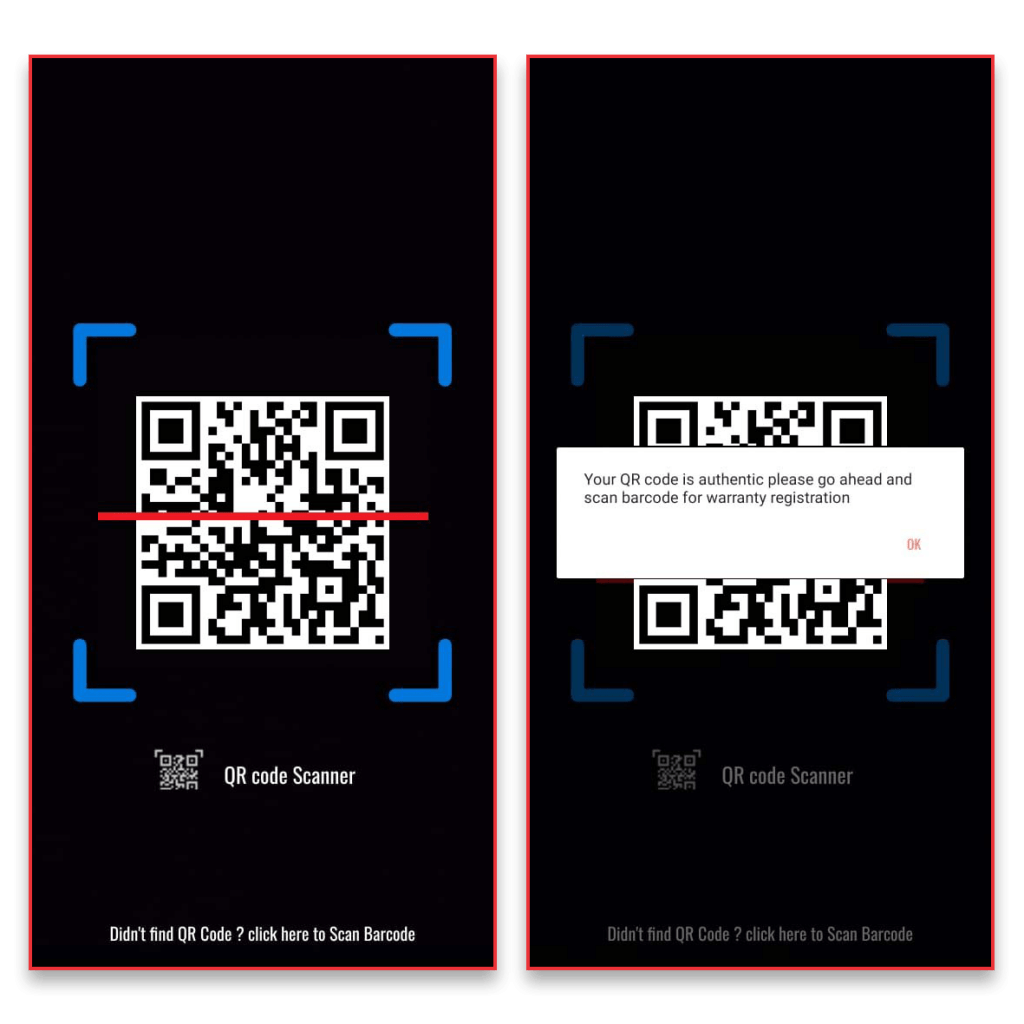
- On this screen, you will find a QR code scanner.
- Scan the QR Code on the box of the product.
- After successful scanning, a pop-up appears confirming the same.
- Click ‘OK’


Step 5 : Scan Barcode
- On this screen, you will find a Barcode scanner.
- Scan the Barcode on the box of the product.
- After successful scanning, a pop-up appears confirming the same.
- Click ‘Proceed’
Step 6 : Fill the Warranty Registration Form
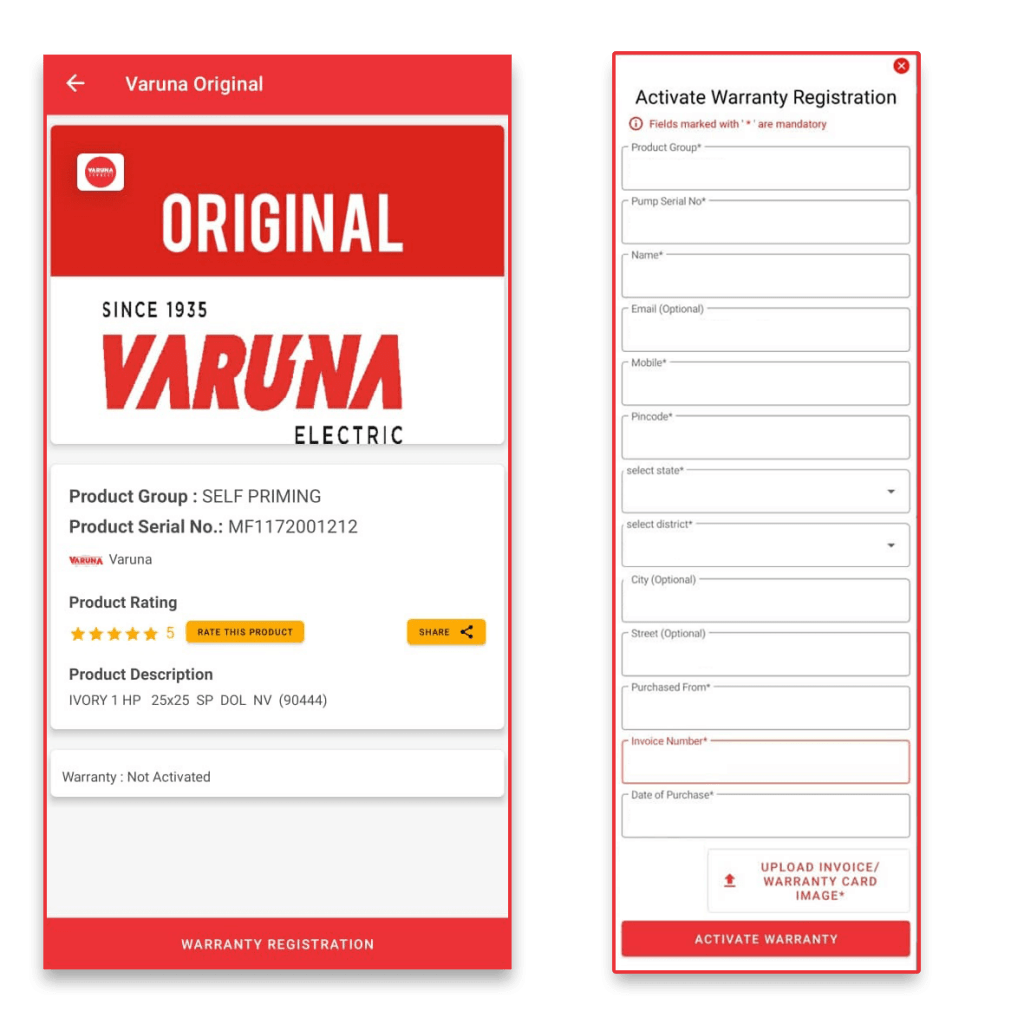
- After Barcode scanning is complete, it redirects to a new page that shows the details of your product. Check if the details are correct.
- Click on ‘Warranty Registration’.
- A Warranty Registration Form opens up.
- Fill in the details requested in the form and attach the copy of your invoice.
- Click on ‘Activate Warranty’
Your Warranty Registration is complete. You will receive an SMS of your registration request.

For Assistance
In case of any assistance required to fill the Warranty Registration Form, please reach out to us.
HelpDesk:
Toll Free - 1800 258 2565
Mobile - +91- 79- 22777485/487
Email ID- varuna.connect@lgmindia.com


